In this tutorial, we will see how to connect Senstroke sensors to Cubase.
Cubase is a computer music software created by Steinberg Media Technologies.
Widely used in the world, it is a digital audio workstation recognized by professional musicians.
The software is available in several versions: Cubase Elements, Cubase Artist and Cubase Pro, each with varying features and different pricing.
We will be connecting Senstroke sensors to Cubase Elements version 10.5.
Senstroke technology reminder
Senstroke sensors allow you to play drums on any surface. They can connect via Bluetooth to a smartphone, tablet or PC.
Senstroke sensors use MIDI technology, which allows use with any digital audio worksation that accepts MIDI via Bluetooth.
Connect Senstroke sensors to Windows
In order to connect the sensors to Windows and then pair them to third party DAW software, it is recommended to download our SensorConnect software.
Feel free to follow our tutorial on how to connect Senstroke sensors to Windows.
Connect Senstroke Sensors to Cubase
Requirements
- Have Senstroke sensors connected to Windows 10 with SensorConnect.
- Having installed Cubase. You can download the software on the official website : https://new.steinberg.net/cubase/
In Cubase
Launch Cubase.
Open a new project in Cubase.
You are now on the software’s main page.
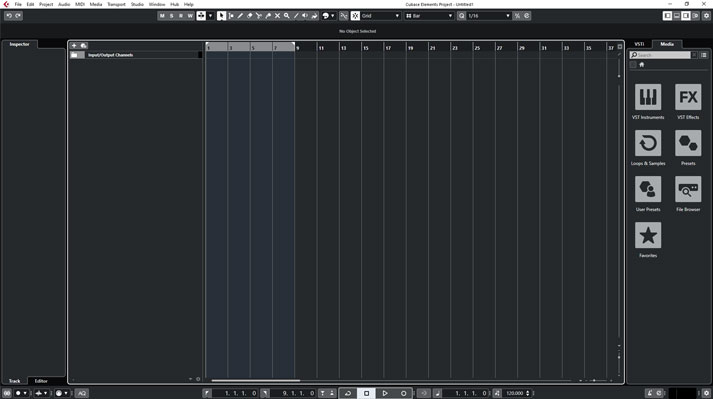
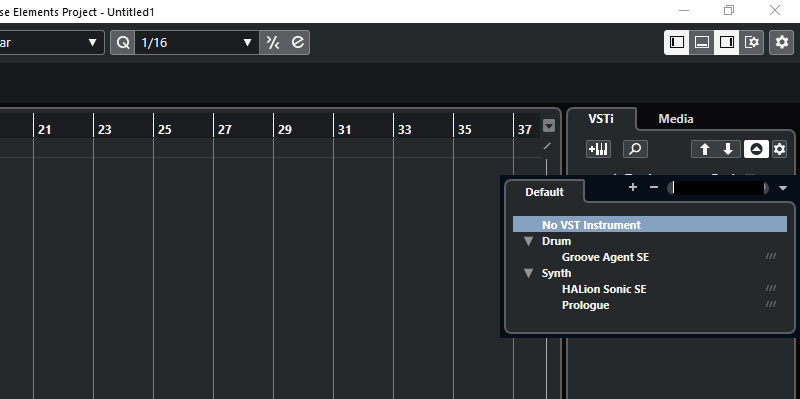
In order to play with drum sounds, you must assign a virtual instrument (VST).
To do this, go to the right window of Cubase, and click on the “Rack” option.
For the purposes of this tutorial, we will use Cubase’s native VST, “Groove Agent SE”.
The following window appears. Click on “Create”.
Creating a midi track will allow you to receive information from the Senstroke sensors and transmit it to the VST.
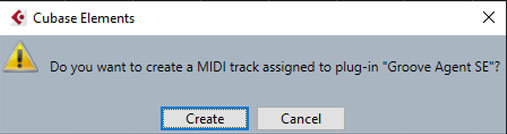
You will therefore have the following architecture: the VST, followed by the corresponding MIDI track.
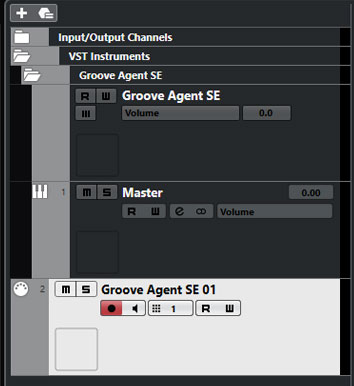
Now go to the left side of the Cubase interface, in the “Inspector” window.
This is where we will link the Senstroke sensors to the Cubase VST.
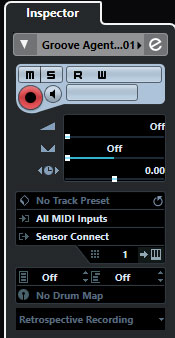
From the MIDI inputs, choose SensorConnect.
Specify the MIDI Channel used by the sensors. It is usual to use channel 9 for percussion.
Change Senstroke mapping in Cubase
You can customize the mapping of MIDI notes in Cubase.
This feature is very useful in case some VSTs do not follow the MIDI note convention.
For example, Cubase receives the MIDI note D1 when the sensors are used as a snare drum.
If your VST is configured differently, then you will need to change the Drum Map.
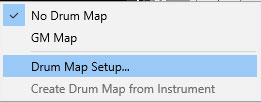
Open the editor by clicking on “No Drum Map,” then click on “Drum Map Settings…”.
The editor will then open.
Click on “Function” then “Load” to load the Senstroke Drum Map available for download HERE.
We have created a drum map corresponding to the elements that can be configured on your sensors.
Senstroke.
The operation is simple :
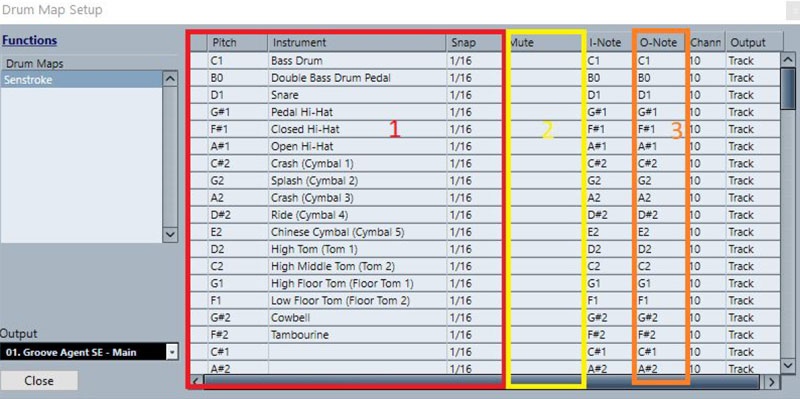
Zone 1 is for information purposes only. It shows you the instrument and its associated note.
You don’t have to change anything here.
Zone 2, mute, allows you to “switch off” an instrument. You can mute an item temporarily using this function. Thus, if you play a snare drum that has been muted with this function, the midi note will be received, but not transmitted to the VST.
Zone 3 allows you to redirect MIDI messages. Let’s take the snare drum as an example.
When typing, the note received is D1 , as indicated in the “I-Note” column (NOT to be modified). If you wish to transmit another note, you can indicate this in zone 3.
For example, if you write C#2: when you strike in the snare drum area, Cubase will receive the note D1 but will transmit the note C#2 to the VST, which will have the effect of playing the Cymbal Crash.
It is therefore possible to completely change the mapping of the notes assigned to the sensors.
This can be used to change the sound without having to reconfigure the Senstroke sensors, or to play notes not initially supported by the sensors.
You can find all our tutorials on Senstroke.com.
If you have any questions, feel free to check out our Redison forum.
Until then, keep on drumming !
